A collection of snippets for my reference. Not everything needs to take up space in my head all the time. :-). Last update: 29-Dec-2021
Fastai show_install()
When working with fastai. This emits a summary of the install fastai, pytorch and cuda libraries and paths. Usefull for reporting issues and for finding the differences in between dev envs.
from fastai.test_utils import show_install
show_install()
=== Software ===
python : 3.7.12
fastai : 2.5.3
fastcore : 1.3.27
fastprogress : 0.2.7
torch : 1.9.0+cu111
nvidia driver : 460.32
torch cuda : 11.1 / is available
torch cudnn : 8005 / is enabled
=== Hardware ===
nvidia gpus : 1
torch devices : 1
- gpu0 : Tesla K80
=== Environment ===
platform : Linux-5.4.104+-x86_64-with-Ubuntu-18.04-bionic
distro : #1 SMP Sat Jun 5 09:50:34 PDT 2021
conda env : Unknown
python : /usr/bin/python3
sys.path :
/content
/env/python
/usr/lib/python37.zip
/usr/lib/python3.7
/usr/lib/python3.7/lib-dynload
/usr/local/lib/python3.7/dist-packages
/usr/lib/python3/dist-packages
/usr/local/lib/python3.7/dist-packages/IPython/extensions
/root/.ipythonAliases
Aliases save typing for common commands and make it easier to remember less common ones. Use naming pnemonics that make sense to you, customise to your workflow/memory. After saving, open a new bash terminal (so the changes can be loaded) and you should be able to run your new ‘commands’. You can also see the commands turn up in auto complete (tab tab). Be careful not to unintentionally name an alias the same as another utility.
In a standard install of ubuntu (via wsl(https://ubuntu.com/wsl) in my case), you will find there may be some aliases in ~/.bashrc but I prefer to separate them into ~/.bash_aliases. ~/.bashrc looks for this alias file when it loads. if ~/.bash_aliases doesn’t exist, you can create it.
# editxxx files
alias editalias='nano ~/.bash_aliases'
alias editbash='nano ~/.bashrc'

# cdxxx change to dir
alias cdproj='cd /mnt/d/proj'

#jupyter lab
alias jl='jupyter-lab --no-browser'

# goxxx use for environments
alias godev='conda activate fastaidev'
alias gotest='conda activate fastaitest39'

#python utils
alias showsys='python -c "import sys, pprint; pprint.pprint(sys.path)"'
alias showfast='python -c "from fastai.test_utils import show_install; show_install()"'
alias showcuda='python -c "import torch; print(torch.cuda.is_available())"'
Git Basics
Just the basics. A more extensive fastai git reference here
Clone Repo
git clone <repo-url>Basic configuration
git config --global user.name <your name>
git config --global user.email <your email>
Initialise a repository
git initView status
git statusView changes (diffs)
# changes to file
git diff <path to file>

# compare files - see difference
git diff <git id 1>..<git id 2>
View commit history
# View all commits. (most recent are shown first)
git log

# View last n commits (e.g last 5).
git log -5
Git Commits
Stage changes
git add <path to file>Commit changes
# commit staged files
git commit -m "<your message>"

# commit specified file
git commit <path to file> -m "<your message>"

# commit all changed files
git commit -am "<your message>"
Return to a previous version
git checkout <git id> <path to file>Push up changes
git pushPull down changes
git pullGit Branching
New branch
git branch <branch-name>Switch branch
git checkout <branch-name>Merge branch with current branch
git merge <branch-name>Checkout branch - (switch to branch)
git checkout <branch-name> Set up branch on remote (GitHub etc)
git push --set-upstream origin <branch-name>Creating Fastai PR
From FastAI - Dev Setup
Create new branch and check it out.
git checkout -b <pr-branch-name>Make changes & test. Remember to run nbdev_clean before
git commit -am "<commit message>"The first time you push from your fork, you need to add -u origin HEAD, but after the first time, you can just use git push
git push -u origin HEADCreate the PR. To use the information from your commit message as the PR title, just run
gh pr create -fTo be interactively prompted for more information (including opening your editor to let you fill in a detailed description), just run gh pr create without the -f flag. As you see above, after it’s done, it prints the URL of your new PR - congratulations, and thank you for your contribution!
Post Fastai PR steps
To keep your fork up to date with the changes to the main fastai repo, and to change from your pr branch back to master, run:
git pull upstream master
git checkout master
In the future, once your PR has been merged or rejected, you can delete your branch if you don’t need it any more:
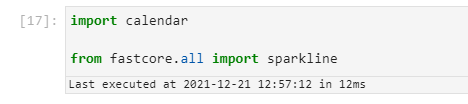
git branch -d test-prAdding Timing to Jupyter Lab/Notebooks Cells.
Display execute time and last run to your jupyter cells with this timer extension.
JupyterLab: https://github.com/deshaw/jupyterlab-execute-time
I have only used/tested the Jupter Lab version. I assume the Jupyter Notebook version works similarly.
Requirements
- JupyterLab >= 3.0
Install
To install this package with pip run
pip install jupyterlab_execute_timeTo install this package with conda run
conda install -c conda-forge jupyterlab_execute_timeNote: for this to show anything, you need to enable cell timing in the notebook via Settings->Advanced Settings Editor->Notebook: {"recordTiming": true}.
This is a notebook metadata setting and not a plugin setting. The plugin just displays this data.
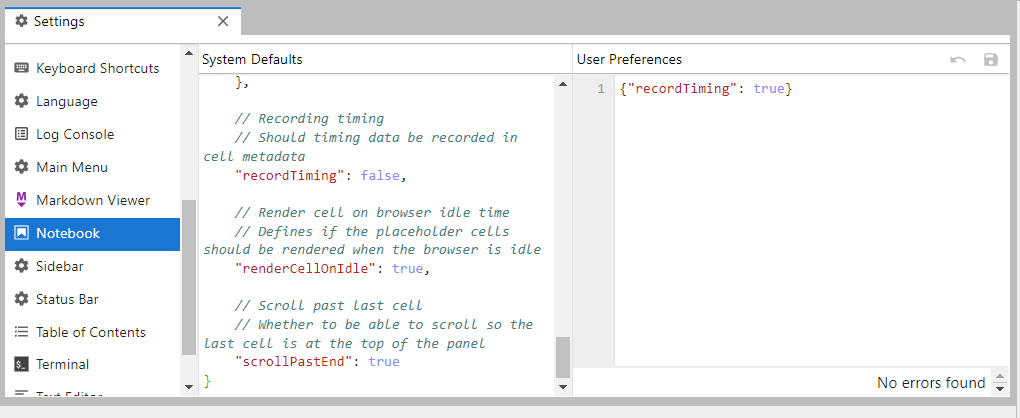
Once installed and appropriate setting has been added, you may be to restart the kernel (or jupyter lab) before you see the results.
Build a Jupyter Document from a json string
Example from Issac.Flath #fastai-help discord. How to structure the output for a Jupyter doc. A jupyter doc is only a specially formated json file
Can also use an API e.g https://nbformat.readthedocs.io/en/latest/api.html#module-nbformat.v4
code1 = """
import pandas as pd
import numpy as np
"""
code2 = "def some_function(): return 'a silly string'"

import json
# this is the notebook structure
nb = {"cells": [],"metadata": {},"nbformat": 4, "nbformat_minor": 4}

def write_code_cell(code): return {"cell_type": "code","execution_count": 0,"metadata": {},"outputs": [],"source": [code]}

for code in [code1,code2]: nb["cells"].append(write_code_cell(code))

with open('output.ipynb', 'w') as f: f.write(json.dumps(nb))